
I started with 6" x 2" bookmarks
(by Recollections, Michael's)

Cut felt pieces 1 3/4" x 2 1/2"

Fold the end to form bottom of matchbook

Score the paper twice
Apx 2 1/2" and 2 3/4"

Put the felt in place

One staple

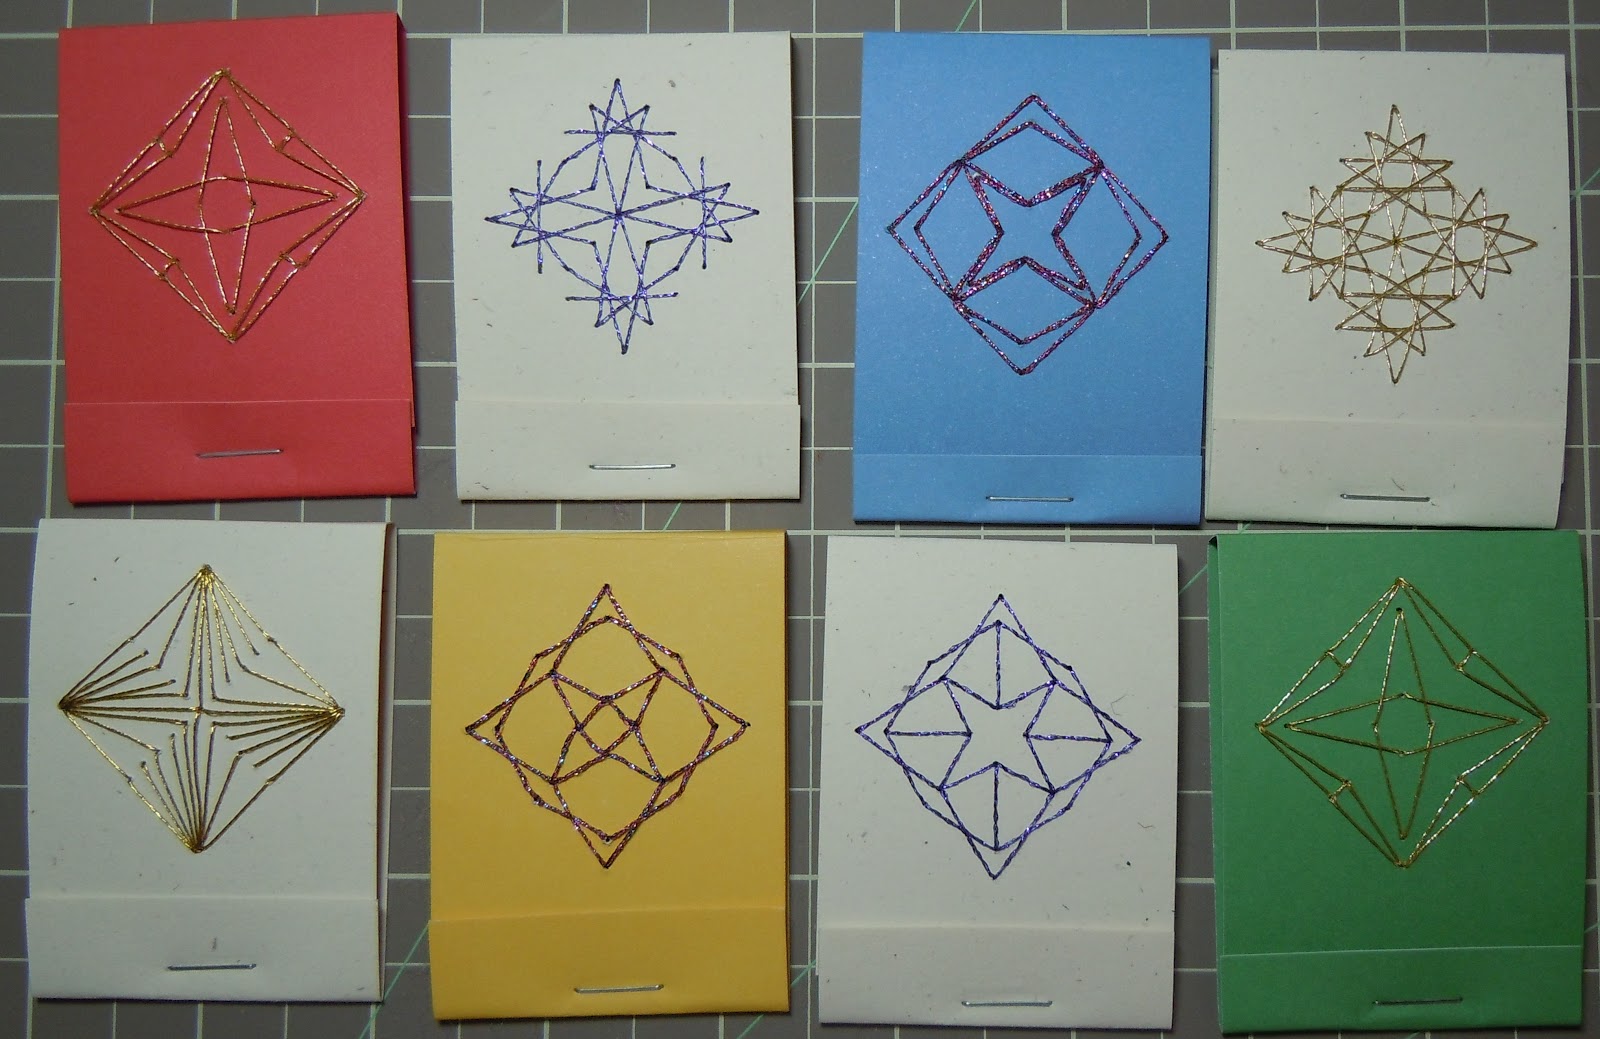
Now the front cover is ready
for decoration.

I used graph paper to create designs
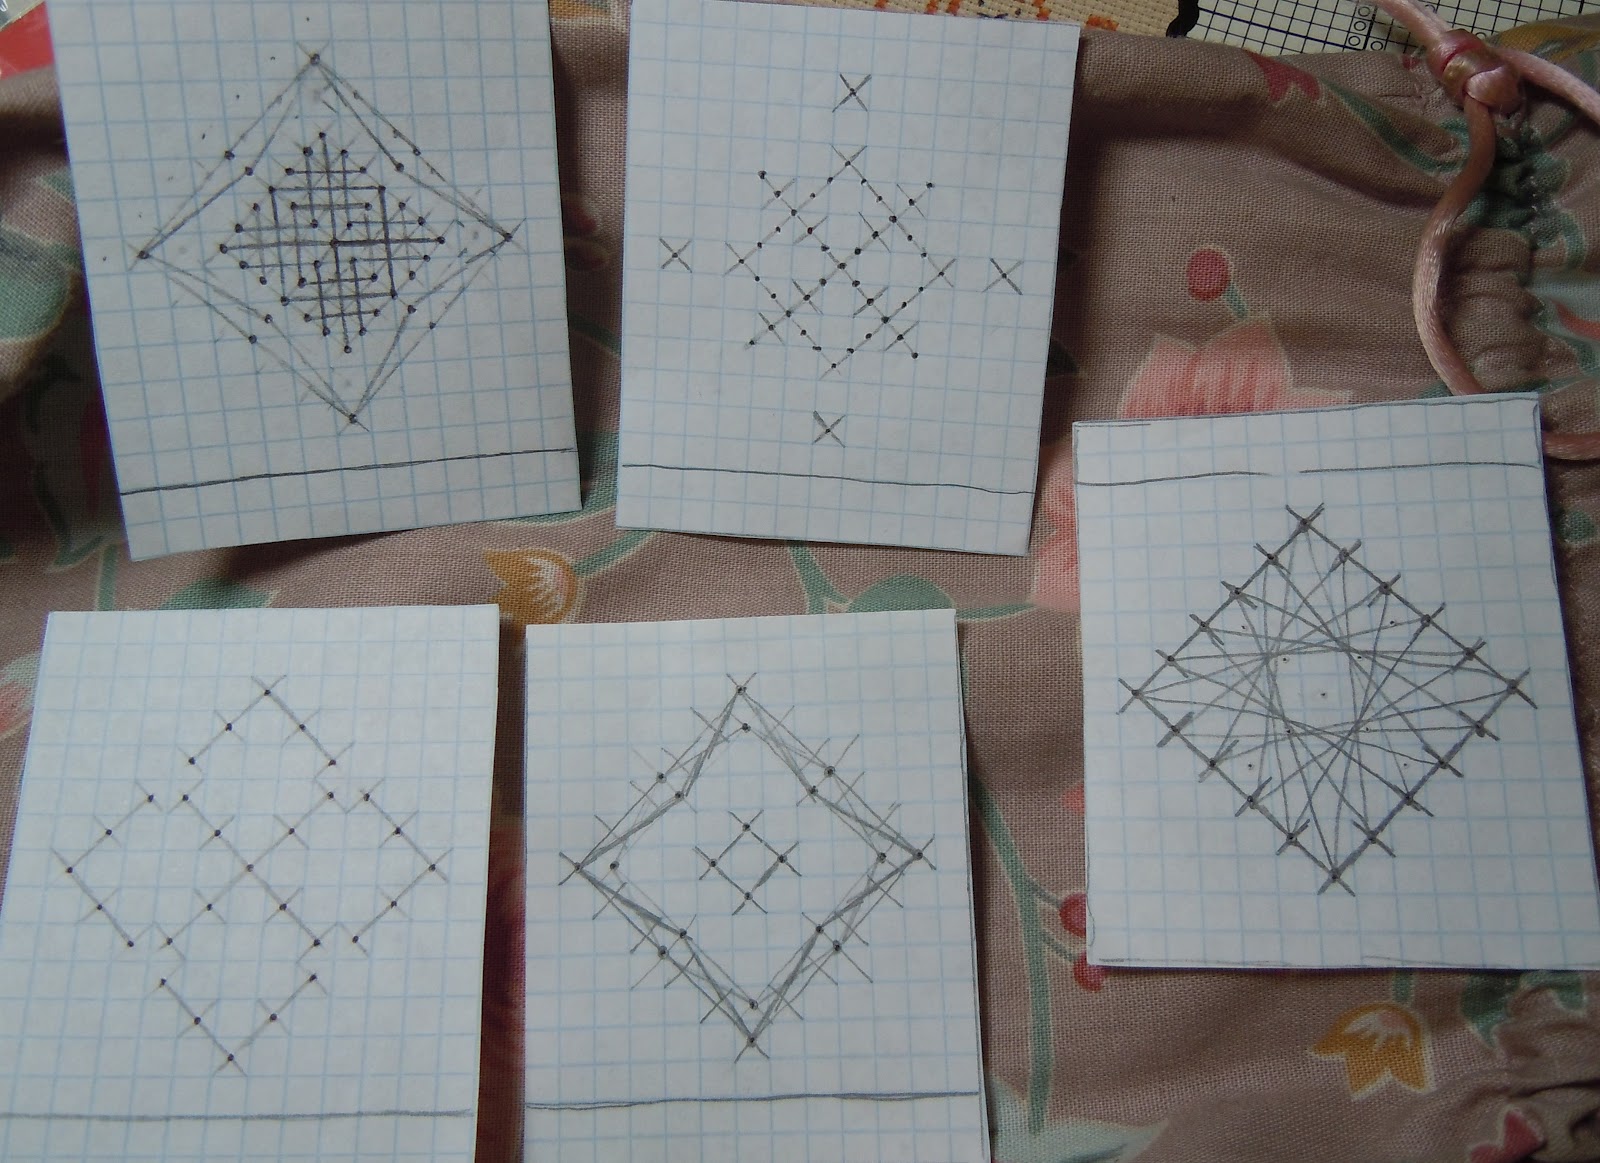
With a lace tool, pricker, I poked holes thru the paper (card board underneath).
A sewing needle could be used for the holes, too.
(*Patterns below)

With DMC thread and #4 Kreinik braid
I threaded a tapestry needle and used the holes
for stitching the geometric designs.


Patterns I created --- the ones with the dots are
for pin holes on the covers .... other pencil diagrams are
suggestions for patterns.

.jpg)
When stitching on the card stock, be mindful of the needle size you are using. If your needle is too large, the card stock will have large holes - I tried a variety of needle sizes for the metallics. I ended up using embroidery needles - sizes 5-10.
Additional information re. stitching on paper

3 comments:
Thanks for this great tutorial! I'm looking forward to decorating mine. The hard part will be choosing a design. I dreamt about so many possibilities last night... yes, I had pleasant dreams!
Oh my gosh, these are GREAT! Thank you for the great tutorial!!
Thank you. What a great gift idea.
Post a Comment